
Creating a booking
Click New Booking from the calendar or bookings list.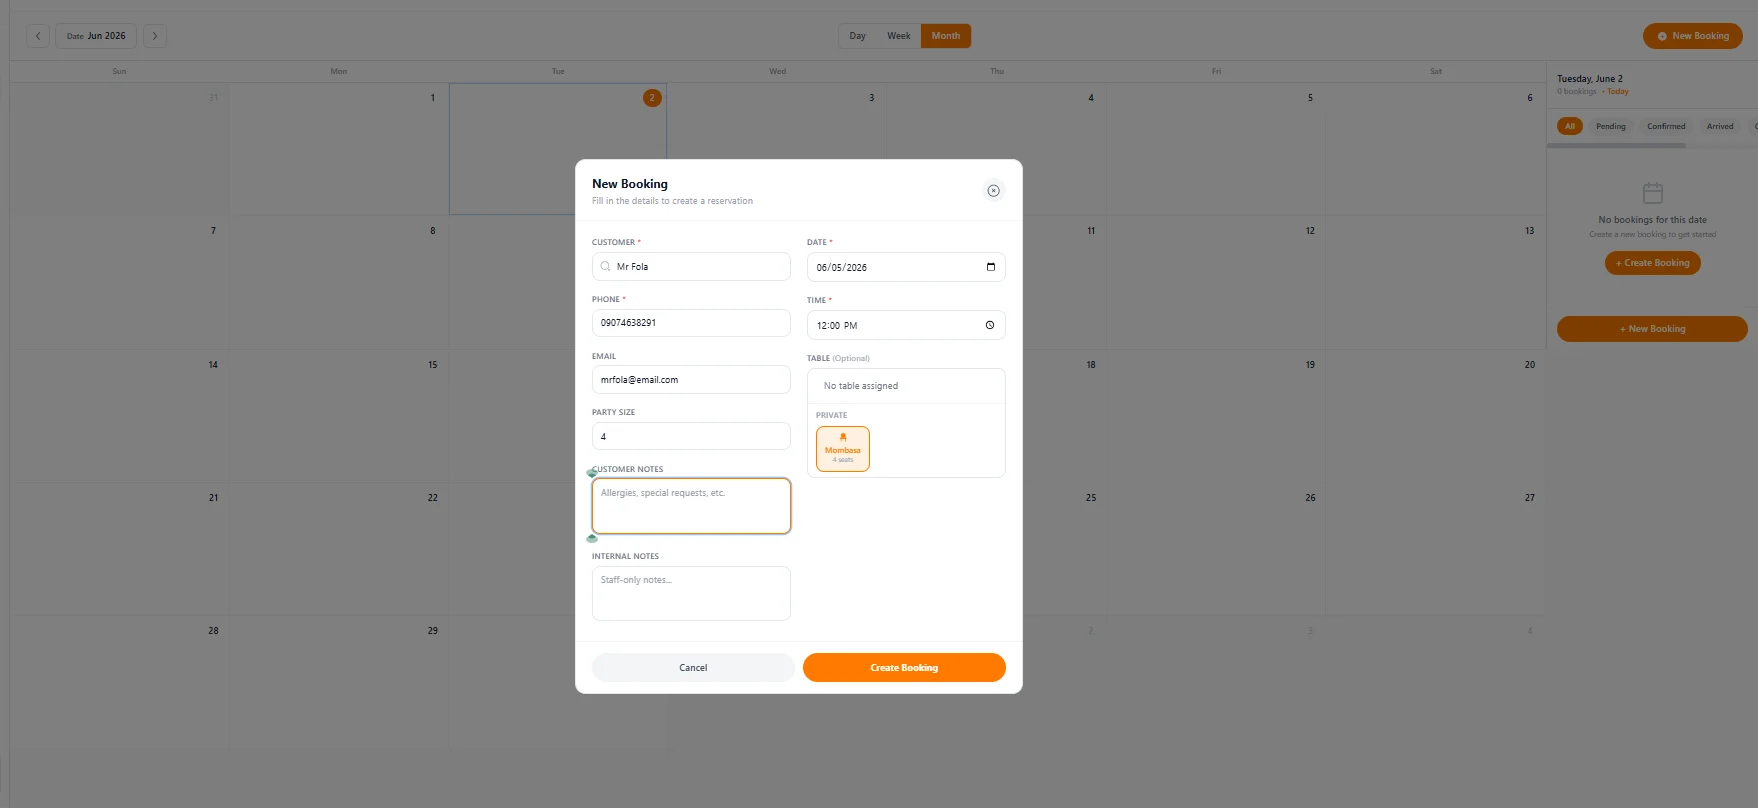
Find or add the customer
Search by name to find an existing customer. Linking to an existing profile adds this booking to their history automatically. If they’re new, type their name and fill in their phone number — that’s all you need.
Set the date and time
Pick the reservation date and arrival time. Time slots are free-form — there are no fixed intervals unless you’ve configured them.
Assign a table (optional)
Choose from your configured tables. You can leave this blank and assign a table when the guest arrives. An orange-highlighted table means it’s selected.
Add notes
- Customer notes — allergies, special requests, preferences. Visible to staff, not shown on any receipt.
- Internal notes — staff-only information like “VIP guest” or “check ID”. Never visible to the customer.
Booking status workflow
Every booking moves through a status as the guest progresses through their visit. Update the status from the booking detail panel using the ··· menu.| Status | When to use it |
|---|---|
| Pending | Just created — not yet acknowledged |
| Confirmed | You’ve acknowledged the booking and it’s happening |
| Arrived | The guest has walked in |
| Seated | The guest is at their table |
| Completed | The visit is done |
| Cancelled | The booking was called off |
| No Show | The guest didn’t appear |
Calendar view
The calendar is your main view for seeing what’s coming up.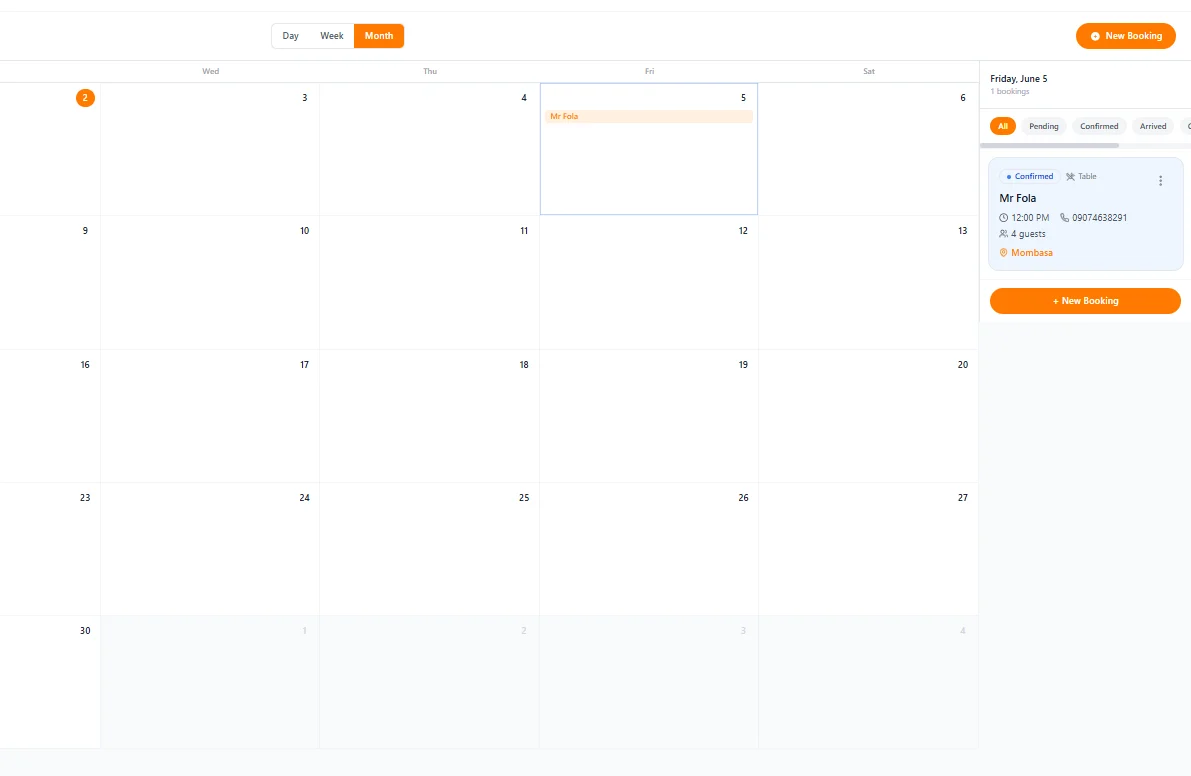
All bookings list
Go to Bookings > All Bookings for a searchable, filterable list of every reservation.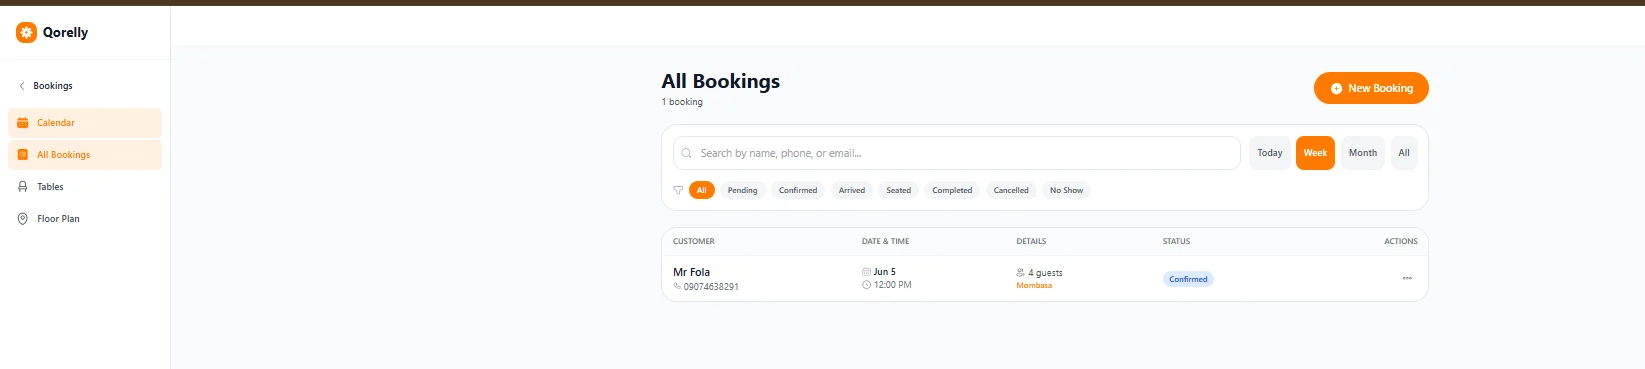
Notifications
When a new booking is created, a notification appears on the bell icon in the top right corner.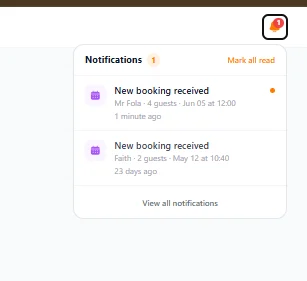
Floor plan
Go to Bookings > Floor Plan to build a visual map of your tables that matches your physical layout.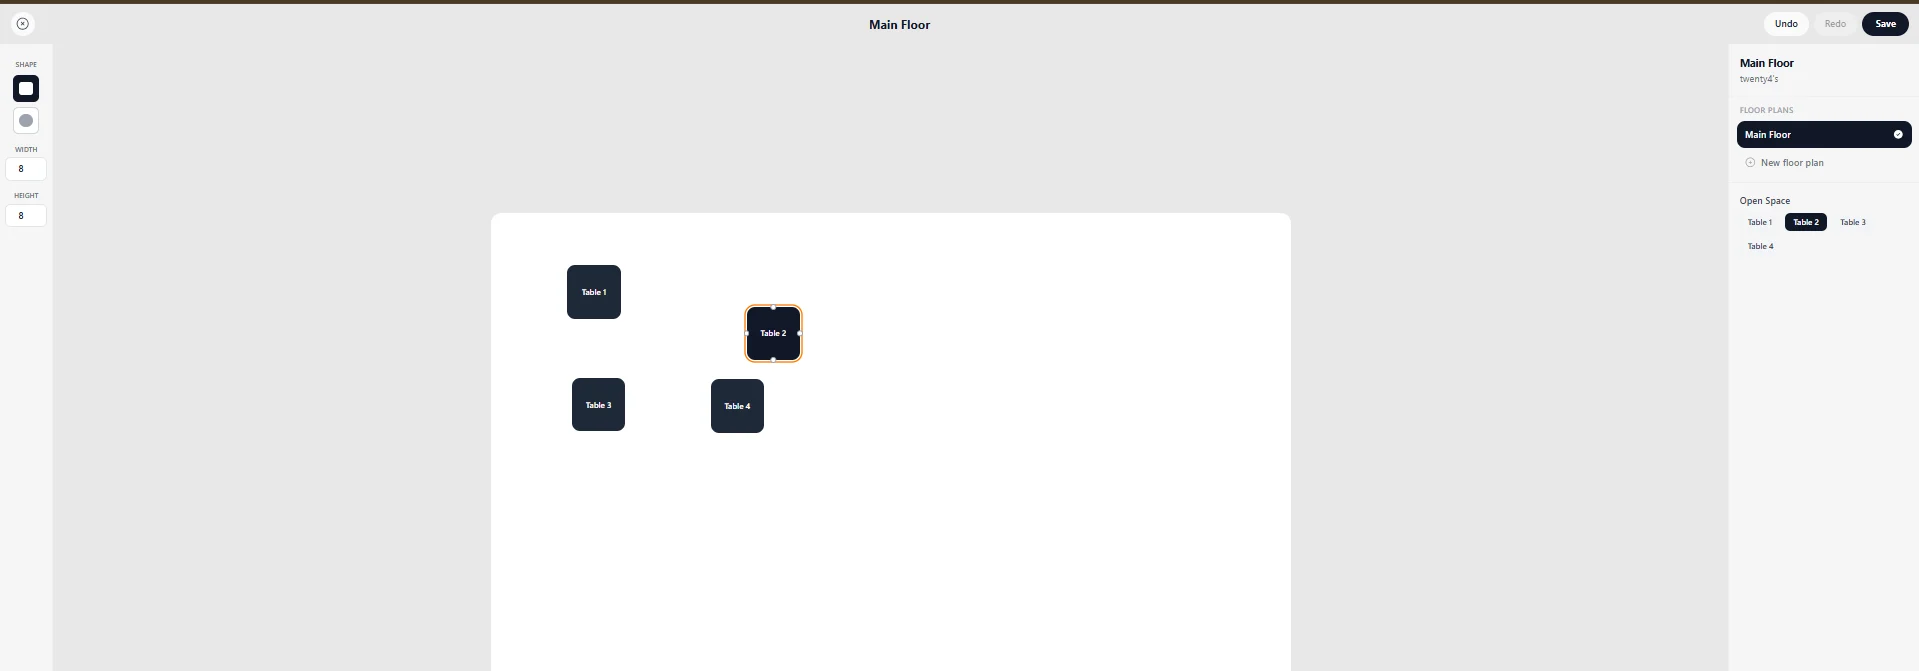
Setting up your floor plan
- Choose a table shape (square or round) from the top-left controls
- Set width and height for the selected table
- Drag tables on the canvas to match your real layout
- Click Save when done
Multiple floor plans
Use the panel on the right to switch between floor plans (e.g. Main Floor, Terrace, Private Room) or create a new one. Each floor plan has its own set of tables.Tables
Go to Bookings > Tables to manage your table list — names, capacity, and which floor plan they belong to. Tables you create here appear in the floor plan editor and in the booking form when assigning a table to a reservation. For each table you can set:
| Field | What to enter |
|---|---|
| Table Number | A short identifier — e.g. “12” or “T-04” |
| Table Name | Optional friendly name — e.g. “Window booth” |
| Area | The section it’s in — e.g. “Main Floor”, “Terrace” |
| Min Capacity / Capacity | Smallest and largest party size that fits |
| Accessible | Tick if the table is wheelchair-accessible — shows a blue badge |
| Available | Untick to mark the table temporarily out of service |
| Notes | Internal staff note — e.g. “near the AC vent” |
Rooms & stations
Go to Bookings > Rooms if your business takes appointments in rooms or at stations instead of tables — spas, salons, clinics, gyms, hotels, and similar. The setup mirrors tables but with fields tailored to the room.
| Field | What to enter |
|---|---|
| Room Number | A short identifier — e.g. “101”, “Suite A” |
| Room Name | What customers and staff call the room — e.g. “Lavender Suite” |
| Room Type | The category — e.g. “Massage”, “Facial”, “Treatment” |
| Capacity | How many people the room takes at once |
| Equipment | Comma-separated tags for what’s in the room — e.g. “massage table, oils, towels” |
| Has shower | Tick if a shower is in or attached to the room |
| Has steam | Tick if the room has a steam feature |
| Available | Untick to mark the room out of service |
| Notes | Internal staff note |
Staff
Go to Bookings > Staff to list the team members who can be assigned to bookings. Useful when customers book a specific therapist, doctor, stylist, or instructor.
| Field | What to enter |
|---|---|
| Name | The staff member’s full name |
| Role | What they do — e.g. “Massage Therapist”, “Hair Stylist” |
| Phone | Optional |
| Optional | |
| Specialties | Comma-separated — e.g. “deep tissue, sports massage” |
| Available | Untick when they’re off — they won’t show as assignable for new bookings |